Unlocking the Re9 Monitor Control Room Safe: Your Comprehensive Guide
In the terrifying world of Resident Evil Requiem (RE9), every resource counts. Ammo, healing items, and crafting components can mean the difference between survival and becoming another victim of the ARK facility's horrors. Among the many secrets and challenges scattered throughout the game, locked safes present an enticing opportunity to stock up on these crucial supplies. One of the most sought-after, often considered the final safe for many completionists, is the Re9 Monitor Control Room Safe. This guide will walk you through its precise location, detail the various safe codes for all difficulty settings, explain how to retrieve the code yourself in-game, and reveal the valuable rewards hidden within.
The Monitor Control Room safe is situated deep within the mysterious ARK facility, an intense endgame area that players navigate amidst the ruins of Raccoon City. Its contents are incredibly helpful, especially as you approach the game's climactic moments. Whether you prefer to meticulously discover every secret or simply want to bypass the danger and get straight to the loot, we've got you covered with all the essential information to crack this final lock.
Where to Find the Re9 Monitor Control Room Safe
Locating the Re9 Monitor Control Room Safe is a key first step. You'll find this particular safe on the B2 Level of the ARK Facility. Access to this section of the facility typically becomes available shortly after you unlock the main Lab Entrance door, a significant progression point in the game.
- Starting Point: From the Lab Entrance, proceed into the main Lobby area.
- Accessing the Room: Look for an adjacent door within the Lobby. This is the door that leads directly into the Monitor Control Room. Some players may recall it as a red door in the Lobby, accessible after solving the Relapsed Panel puzzle.
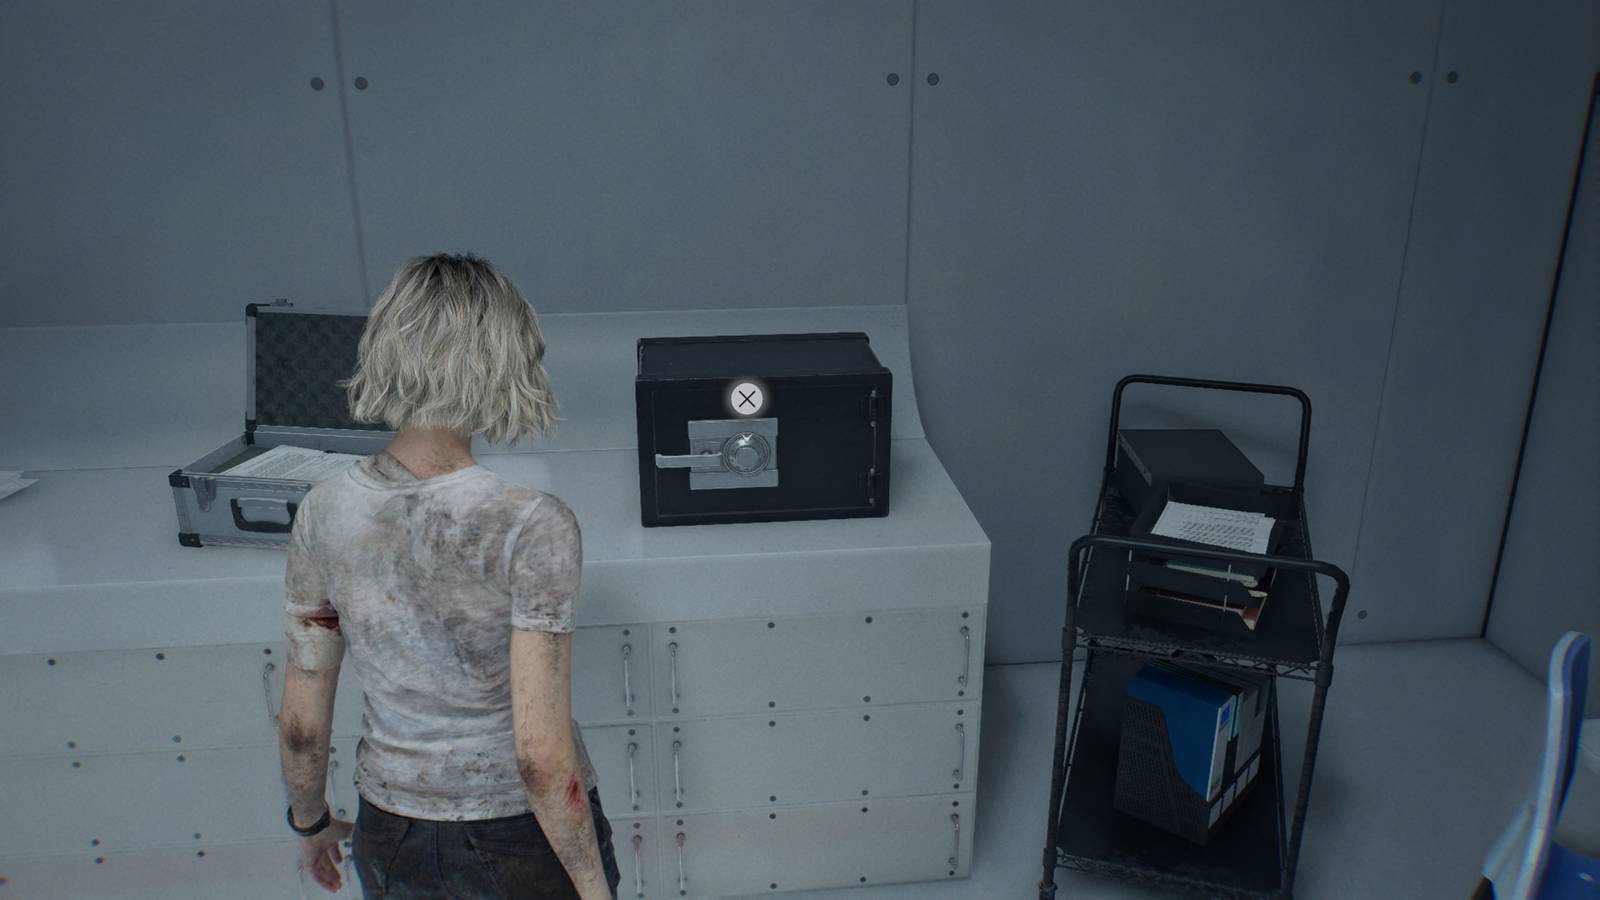
- Safe Location: Once inside the Monitor Control Room, the safe is hard to miss, usually positioned prominently within the room.
This area, connected directly to the Lobby, places it within a more central and accessible part of the facility once you've made significant progress. However, reaching the area where the code is hidden will require a more perilous journey.
Finding the Code In-Game: A Treacherous Path to Bioweapon Repository 05
For those who prefer the thrill of in-game discovery, the dedicated staff of the ARK facility conveniently left the safe code on a document. However, acquiring this document is not a simple task; it demands careful navigation and combat prowess. To locate the code for the Re9 Monitor Control Room Safe, you must venture into a particularly dangerous section of the facility: Bioweapon Repository 05.
- Route to the Repository: From the same general area as the Lobby (after the Lab Entrance), you'll need to go down a set of stairs to reach Bioweapon Repository 05.
- Enemies Ahead: Prepare for a challenging encounter. This area is heavily infested not only with standard zombies but also with the notoriously agile and deadly Lickers. These creatures are blind but possess acute hearing, making stealth difficult and direct confrontation resource-intensive. Consider preparing a couple of acid bottles or other powerful area-of-effect weapons to manage groups.
- Code Location within the Repository: Once you've entered Bioweapon Repository 05, look for an open container. This container is typically found in the middle row, on the right side of the room. Inside, you'll discover the document containing the safe code, often accompanied by some useful scrap materials.
After successfully retrieving the code, there isn't a direct shortcut back to the Monitor Control Room from Bioweapon Repository 05. This means you'll need to backtrack through the Lobby to access the safe. This round trip requires you to either expertly dodge the relentless Lickers and other threats, saving valuable resources, or commit to spending ammo and healing items to clear your path. For comprehensive guidance on both the location and code, be sure to check out our RE9 Monitor Control Room Safe Code & Location Guide.
The Definitive Re9 Monitor Control Room Safe Codes for Every Difficulty
If you're looking to bypass the dangerous trek to Bioweapon Repository 05 or simply prefer to save your precious inventory for more critical encounters, here are the exact codes needed to open the Re9 Monitor Control Room Safe on all difficulties. Remember, safe input in Resident Evil games requires specific turns; do not pull the safe handle until all three turns are correctly inputted, or you risk resetting the combination.
Casual / Normal Difficulty Safe Code:
To open the safe on these standard difficulties, input the following sequence:
- Turn the dial Left to 50
- Turn the dial Right to 60
- Turn the dial Left to 80
Execute these turns precisely, then pull the handle to reveal your rewards.
Insanity Difficulty Safe Code:
As with many puzzles and challenges in Resident Evil Requiem, the Insanity difficulty often introduces new twists, and the Monitor Control Room safe is no exception. The code changes entirely, demanding a different sequence:
- Turn the dial Right to 20
- Turn the dial Left to 0 (Zero)
- Turn the dial Right to 70
Insanity mode not only alters the code but also generally increases the scarcity of resources and the deadliness of enemies, making every item gained from a safe even more critical. Getting these codes right the first time can save you significant frustration and potential resource waste. For more detailed insights into this specific safe and its rewards, you might find our article Unlock RE9's Final Safe: Monitor Control Room Codes & Rewards particularly useful.
Beyond the Lock: What Valuable Rewards Await You?
Once you've successfully entered the correct code for the Re9 Monitor Control Room Safe and hear that satisfying click, you'll gain access to a trio of highly beneficial items. These rewards are carefully chosen to assist players in the later stages of the game, where every advantage can make a significant difference:
- One Bottle of Acid: A potent crafting component for special ammunition or throwable weapons like Acid Grenades. Especially useful against armored enemies or to quickly dispatch groups.
- One Empty Bottle: A versatile item that can be combined with other chemicals to create various useful tools, from healing salves to offensive weapons. In a game where crafting is key, an empty bottle is always a welcome find.
- One Med Injector: A top-tier healing item that restores a substantial amount of health, often more than standard first aid sprays. In the intense boss battles and enemy gauntlets of the endgame, a Med Injector can be a lifesaver.
The combination of offensive utility (Acid), crafting flexibility (Empty Bottle), and crucial recovery (Med Injector) makes the contents of the Re9 Monitor Control Room Safe incredibly valuable. On higher difficulties, where resources are critically scarce, these items can significantly alleviate pressure and provide the edge you need to push through challenging segments. It's a worthy reward for the effort of either finding the code or simply knowing it beforehand.
Conclusion
Cracking the Re9 Monitor Control Room Safe is a satisfying accomplishment in Resident Evil Requiem, offering a significant boost to your dwindling supplies as you near the game's thrilling conclusion. Whether you braved the Licker-infested Bioweapon Repository 05 to find the code yourself or utilized this guide to quickly unlock its secrets, the strategic items within will undoubtedly aid your survival. Remember to always prioritize resource management and approach each encounter in the ARK facility with caution. Good luck, and may your journey through Resident Evil Requiem be a successful one!